Last Updated on January 14, 2024 by cscontents
Introduction
In this article we will guide you through nginx installation. We will see installation on both Red Hat Linux & Ubuntu.
Prerequisite Knowledge
- Knowledge of NGINX
- Basic knowledge of networking
Installation steps of NGINX on Red Hat Linux
Below are the steps to install NGINX on Red Hat Linux –
Step 1: Enable NGINX module
On Red Hat Linux we need to enable the NGINX module first.
Before enabling we can check if nginx module is already enabled or not –
sudo yum module list nginx
The above command will list all the nginx module. If you see the nginx module with the required version is enabled, then no need to enable it again.
Otherwise, we need to execute below command on Red Hat Linux to enable the NGINX module. Here we will install nginx 1.16, so we will enable nginx 1.16. If you want different version, then enable that version by mentioning the version.
sudo yum module enable nginx:1.16
Step 2: Install NGINX
Once required nginx module is enabled, now we need to install it.
sudo yum install nginx
Step 3: Start NGINX
Now we need to start nginx.
sudo systemctl start nginx
Step 4: Check status of NGINX
To check the status of nginx, we need to run the below command.
sudo systemctl status nginx
In our case output of the above command is below.
nginx.service - The nginx HTTP and reverse proxy server
Loaded: loaded (/usr/lib/systemd/system/nginx.service; disabled; vendor preset: disabled)
   Active: active (running) since Tue 2022-11-29 03:12:32 UTC; 2s ago
  Process: 6133 ExecStart=/usr/sbin/nginx (code=exited, status=0/SUCCESS)
  Process: 6131 ExecStartPre=/usr/sbin/nginx -t (code=exited, status=0/SUCCESS)
  Process: 6129 ExecStartPre=/usr/bin/rm -f /run/nginx.pid (code=exited, status=0/SUCCESS)
 Main PID: 6134 (nginx)
    Tasks: 3 (limit: 23900)
   Memory: 3.1M
   CGroup: /system.slice/nginx.service
           ├─6134 nginx: master process /usr/sbin/nginx
           ├─6135 nginx: worker process
           └─6136 nginx: worker process

Nov 29 03:12:32 nginx-machine systemd[1]: Starting The nginx HTTP and reverse proxy server...
Nov 29 03:12:32 nginx-machine nginx[6131]: nginx: the configuration file /etc/nginx/nginx.conf syntax is ok
Nov 29 03:12:32 nginx-machine nginx[6131]: nginx: configuration file /etc/nginx/nginx.conf test is successful
Nov 29 03:12:32 nginx-machine systemd[1]: Started The nginx HTTP and reverse proxy server.
Step 5: Access NGINX home page from browser
To access the nginx homepage, we need to allow port 80 (default port for nginx is 80) in the OS level firewall of Red Hat Linux.
Now there is two option –
- If you don’t want to use firewalld, then you can stop it and disable it by running below command.
sudo systemctl stop firewalld
sudo systemctl disable firewalld
- If you want to continue with firewalld, then you need to allow the port 80 in firewalld. Below is the command by which we can allow port 80.
We can check which ports are already allowed by running below command.
sudo firewall-cmd --list-ports
We can allow port 80 by running below command.
sudo firewall-cmd --add-port=80/tcp
If you are using VM from cloud platform like Azure or AWS or GCP then you need to allow port 80 at the network layer by logging into concerned cloud portal. You need to add an inbound security rule with port 80.
If you want to change the default port then you need to modify the /etc/nginx/nginx.conf file.
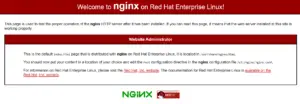
Now, you can try accessing NGINX from any browse by typing http://public_ip_of_your_machine:80

Installation steps of NGINX on Ubuntu
Below are the steps to install nginx on ubuntu.
Step 1: Install NGINX
To install on Ubuntu, we need to execute the below commands one by one.
sudo apt update
sudo apt install nginx -y
Step 2: Check the status of NGINX
Once we are done with installation, we can check the status –
systemctl status nginx
Thank You.
If you are interested in learning DevOps, please have a look at the below articles, which will help you greatly.
- Kubernetes Series: Part 1 – Introduction to Kubernetes | Background of Kubernetes
- Kubernetes Series: Part 2 – Components of Kubernetes cluster | Kubernetes cluster in detail
- Kubernetes Series: Part 3 – What is Minikube and How to create a Kubernetes cluster (on Linux) using Minikube?
- Introduction to Ansible | High Level Understanding of Ansible
- Basics of automation using Ansible | Automate any task
- Automation of Java installation – using Ansible
- Automation of JBoss EAP installation – using ansible
- Jenkins Pipeline as code – High level information
- Jenkins pipeline script to build Java application and push artifacts into repository
- Jenkins pipeline script to build & deploy application on web server
- What is End-to-End Monitoring of any web application, and Why do we need it?
- What is “Monitoring” in DevOps? Why do we need to Monitor App/DB servers, Transactions etc.?
- DevOps Engineer or Software Developer Engineer which is better for you?- Let’s discuss
- How To Be A Good DevOps Engineer?
- How to do git push, git pull, git add, git commit etc. with Bitbucket

