

Last Updated on April 19, 2024 by cscontents
Introduction
Spinnaker is an open-source continuous delivery platform offering a powerful solution for the Continuous Delivery (CD) process. Tools like Jenkins is majorly used for the Continuous Integration (CI) process (automation of the build & testing). But coming to Spinnaker, it is specially used for the CD process. Also, Spinnaker is a cloud-agnostic tool, which means it does not matter which cloud platform you are using, Spinnaker can be configured in same way for all the target deployment platforms.
At its core, Spinnaker aims to streamline and automate the complex process of software delivery. Its versatility is evident as it seamlessly integrates with platforms such as Amazon Web Services (AWS), Microsoft Azure, Google Cloud Platform (GCP), and Kubernetes, fostering a truly cloud-agnostic approach to deployment targets.
One more important information regarding Spinnaker is, it was developed by Netflix and later it was open-sourced.
Brief Overview of Spinnaker Architecture
Before moving forward to Spinnaker installation, we need to have some basic understanding of Spinnaker architecture.
Spinnaker is comprised of some microservices. These microservices are independent of each other. Below are a few microservices with a brief description.
- Gate: The Gate service serves as the API gateway for Spinnaker, handling user interface interactions and acting as a centralized entry point for external systems.
- Front50: Front50 is Spinnaker’s configuration repository, storing pipeline configurations, application settings, and other metadata.
- Igor: Igor is responsible for interacting with various continuous integration (CI) systems like Jenkins, Travis CI, etc.
- Echo: Echo manages the event stream within Spinnaker, handling notifications about pipeline executions, updates, and other system events.
- Orca: It is the orchestration engine in Spinnaker, responsible for executing deployment pipelines and managing the workflow.
- Rosco: Rosco is Spinnaker’s image bakery, providing a standardized process for creating machine images for various cloud providers.
- Clouddriver: Clouddriver is the component responsible for interacting with cloud providers, abstracting the underlying infrastructure details.
- Deck: Deck is the web-based user interface (UI) for Spinnaker, providing a user-friendly console for configuring pipelines, monitoring deployments, and managing applications.
For more detailed information regarding Spinnaker UI, you can follow this document: Spinnaker Architecture
Plan or Agenda of this Guide
We will install Spinnaker using Halyard or hal. Halyard is a Command Line Interface (CLI) or CLI tool that is used to deploy or install Spinnaker.
One important point is regarding Spinnaker which we need to know, it is recommended that Spinnaker need to be installed/deployed in a Kubernetes cluster. That is because Spinnaker needs some persistent storage to store sensitive information. In other words, Spinnaker requires storage from external to persist application settings and pipeline configuration data. Normally when we deploy any pod in Kubernetes it is easy to attach persistent volumes. Similarly, if we deploy Spinnaker as a pod in the Kubernetes cluster we would mount persistent volumes in that pod.
Now, if we want to install/deploy Spinnaker in a VM, in that case, we need to add some persistent storage to our Spinnaker instance. Below are the supported storage solutions that can be used.
In this guide, we will use Azure Storage. We will create a storage account in Microsoft Azure and in that storage account, we will create a container. Finally, we will configure that storage in hal through which it will be added to the Spinnaker instance.
Prerequisite
- Halyard (Hal) runs on Ubuntu 18.04 or higher and Debian 10 or higher. So, we need an Ubuntu machine where this version requirements meet.
- The Linux VM should have 4-8 vCPUs and 8-16 GiB of memory for learning, training, and development purposes.
- In the network of that Linux machine, the required ports (inbound) should be open. For example, Spinnaker UI runs at port 9000 (by default).
- Need to have an account in cloud platforms like Microsoft Azure, AWS, GCP, etc, and should have enough privileges to create storage. In this guide, we will use Microsoft Azure where we will create a storage account.
- On the Linux machine you need a non-root user with sudo privileges to perform the activity.
- Last but not least, you should have some hands-on experience in using Linux commands.
Steps to install Spinnaker
Below are the steps that you need to follow to install Spinnaker in a Virtual Machine (VM).
Step 1: Download the Shell script to install Halyard
We will use a shell script to install Halyard on Ubuntu. You need to download that script to your machine and execute it.
curl -O https://raw.githubusercontent.com/spinnaker/halyard/master/install/debian/InstallHalyard.shStep 2: Installation of hal (halyard)
Run the downloaded script to install Halyard.
sudo bash InstallHalyard.shWhen you run the above command, it will ask for confirmation of below.
“Would you like to configure halyard to use bash auto-completion? [default=Y]:”, you can go with the default option (Yes).
Halyard will run as a daemon in the Linux machine.
Step 3: Check the version of the hal
Run below to check the version of the installed hal.
hal -vThe above command will give the hal version. In our case, below is the output.
1.63.0If the above command gives any error, we can check the logs in /var/log/spinnaker/halyard/*.log file. From the logs, we can identify if there is any issue and find a solution for it.
Step 4: Set the Spinnaker Version
We need to set the Spinnaker version that we want to install.
Run the below command to list the available version.
hal version listThe above command will give output like below.
+ Get current deployment
  Success
+ Get Spinnaker version
  Success
+ Get released versions
  Success
+ You are on version "", and the following are available:
 - 1.31.3 (v1.31.3):
   Changelog: https://spinnaker.io/changelogs/1.31.3-changelog/
   Published: Tue Nov 28 08:09:43 UTC 2023
   (Requires Halyard >= 1.45)
 - 1.32.3 (v1.32.3):
   Changelog: https://spinnaker.io/changelogs/1.32.3-changelog/
   Published: Tue Nov 28 10:24:17 UTC 2023
   (Requires Halyard >= 1.45)
 - 1.33.0 (v1.33.0):
   Changelog: https://spinnaker.io/changelogs/1.33.0-changelog/
   Published: Fri Jan 05 05:59:53 UTC 2024
   (Requires Halyard >= 1.45)
Next, set the version. In this guide, we will go with version 1.31.3, and run the below command to do the same. In the below command, you can replace the version if you want to install other versions.
hal config version edit --version 1.31.3The above command will give output like below.
+ Get current deployment
  Success
+ Edit Spinnaker version
  Success
+ Spinnaker has been configured to update/install version "1.31.3".
  Deploy this version of Spinnaker with `hal deploy apply`.
Step 5: Create Persistent Storage in Cloud Platform
In this guide, we will use Azure storage. To do this we will install Azure-CLI in that machine and log into Azure account through CLI. Once logged in, then we will create the below resources.
- Resource Group
- Storage Account
- Storage Container inside the storage account.
Run the below commands one by one.
Starting with Azure-CLI installation.
sudo apt install azure-cliOnce Azure-CLI installation completes, verify the installation by running the below command.
az --versionNext, log into your Azure account. For that run the below command and follow the steps mentioned in the output to login.
az loginNext, (Optional) if you have multiple Azure accounts, you can set the subscription ID of that account where you want to create.
az account set --subscription <enter subscription id>Next, we will create a new Resource Group. Let’s set the resource group name in a parameter. Run the below command.
RESOURCE_GROUP="SpinnakerStorageResourceGroup"Run the below command to create the resource group.
az group create --name $RESOURCE_GROUP --location 'East US'Next, we will create a storage account. Let’s set the storage account name in a parameter. Run the below command to do so.
STORAGE_ACCOUNT_NAME=spinnakerstorageNext, run the below commands,
az storage account create --resource-group $RESOURCE_GROUP --sku STANDARD_LRS --name $STORAGE_ACCOUNT_NAMENow, before moving to the next step where we will configure the storage account with ‘hal’, we need the storage account key using which it will be able to connect. We will get the key and store it in a parameter. Run the below command to do so.
STORAGE_ACCOUNT_KEY=$(az storage account keys list --resource-group $RESOURCE_GROUP --account-name $STORAGE_ACCOUNT_NAME --query [0].value | tr -d '"')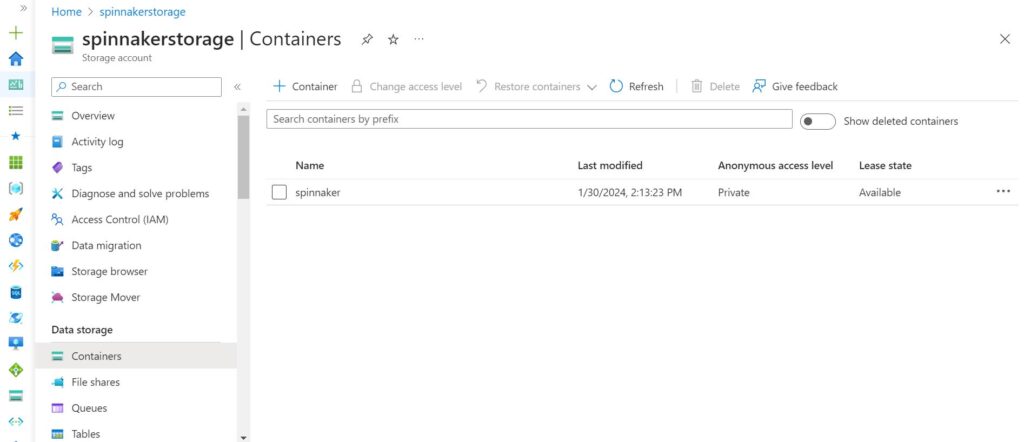
Step 6: Configure Persistent Storage in hal
To configure the storage which we created in the previous step, run the below commands.
The below command will edit the Azure storage related configuration in hal.
hal config storage azs edit --storage-account-name $STORAGE_ACCOUNT_NAME --storage-account-key $STORAGE_ACCOUNT_KEYThe above command will give output like below.
+ Get current deployment
  Success
+ Get persistent store
  Success
+ Edit persistent store
  Success
Validation in default.persistentStorage:
- WARNING Your deployment will most likely fail until you configure
  and enable a persistent store.

+ Successfully edited persistent store "azs".
Next, run the below command to set Azure Storage as persistent storage in hal.
hal config storage edit --type azsThe above command will give output like below.
+ Get current deployment
  Success
+ Get persistent storage settings
  Success
+ Edit persistent storage settings
  Success
+ Successfully edited persistent storage.
Step 7: Apply the Spinnaker Configurations
Next, we need to apply the spinnaker configurations by running the below command.
sudo hal deploy applyThis command needs to be run with sudo. Otherwise, it might give some error. In our case, we tried to run without sudo, and it gave the below error.
! ERROR Error encountered running script. See above output for more
  details.
Running the above command will take some time, we might need to wait 2-5 minutes.
Step 8: Connect hal client with Spinnaker
In the output of the previous step, it will tell us to run a command that will connect hal with Spinnaker. We need to run that command and after that, we will be able to access Spinnaker over port 9000.
Below is the command.
sudo hal deploy connectIf you run the above command without ‘sudo’, it might give the below error.
! ERROR Error encountered running script. See above output for more
  details.
Step 9: Validate the Spinnaker UI access
This is the final step, where we need to validate the spinnaker installation.
We can run the below command to check whether the spinnaker is running or not.
curl -v localhost:9000As discussed previously, Spinnaker has various components among those Deck and Gate are the top interaction points for the users. Deck is the browser-based UI and Gate is the API Gateway of Spinnaker. Using Gate, Spinnaker UI and all other API callers communicate with Spinnaker.
This Gate API Gateway runs on port 8084. So, over this port, Spinnaker UI will communicate with the Gate.
Since we have deployed the Spinnaker in a VM (Linux machine), now by default you might not be able to access the Spinnaker UI from a browser. Below are a few options which you can try.
- Forward port 9000 (from the Linux machine where Spinnaker is running) to a port on your local computer (your desktop/laptop) using tools like MobaXterm.
- Install a GUI in the Linux machine where your spinnaker is running. This might not be a good option, still, you might consider it.
- Running the below commands and changing the URL or Spinnaker UI and API.
hal config security ui edit \
    --override-base-url <new_base_ui_url>
And
hal config security api edit \
    --override-base-url <new_base_api_url>
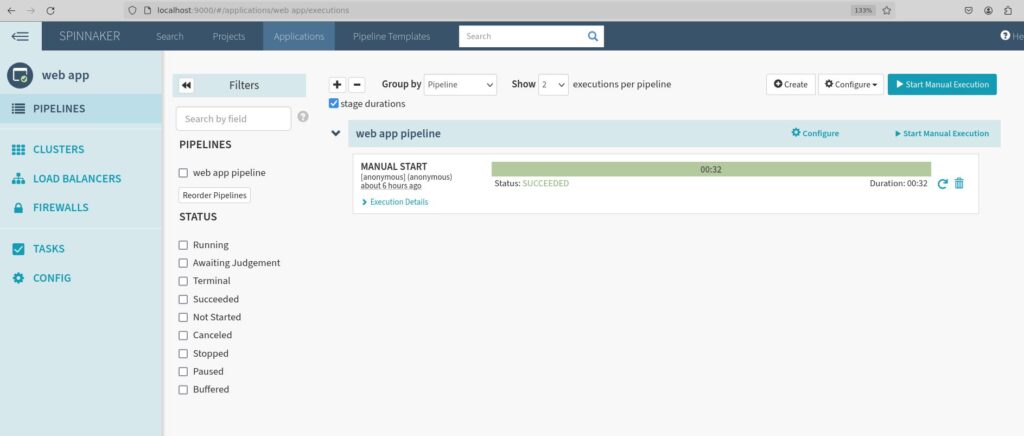
Below is the screenshot of our Spinnaker UI, where we ran a sample pipeline.
Thank you.
If you are interested in learning DevOps, please have a look at the below articles, which will help you greatly.
- Kubernetes Series: Part 1 – Introduction to Kubernetes | Background of Kubernetes
- Kubernetes Series: Part 2 – Components of Kubernetes cluster | Kubernetes cluster in detail
- Kubernetes Series: Part 3 – What is Minikube and How to create a Kubernetes cluster (on Linux) using Minikube?
- Introduction to Azure DevOps – High-level information
- Introduction to Ansible | High-Level Understanding of Ansible
- Basics of automation using Ansible | Automate any task
- 10 frequently used Ansible modules with example
- Jenkins Pipeline as code – High-level information
- What is End-to-End Monitoring of any web application and Why do we need it?
- DevOps Engineer or Software Developer Engineer which is better for you?- Let’s discuss
- How To Be A Good DevOps Engineer?
- How to do git push, git pull, git add, git commit, etc. with Bitbucket