
Last Updated on February 5, 2024 by cscontents
Introduction to Docker
Docker is a containerization platform. Docker provides us with OS-level virtualization, we can use it to package software and run them as containers. To deploy an application as a docker container we need a docker image of that application, the docker image can be built from a Dockerfile. A Dockerfile is nothing but a text document that contains all the commands that we need to run to build the Docker image. If we don’t use the Dockerfile, then we need to run all the commands manually to build that Docker image. So, it is better to put all those commands in a text file (Dockerfile) and use it as many times as you want to build the image.
To know more about Docker, you can have a look at the wiki page of Docker.
If you would like to know about Hypervisor & Container Technology, then please head over to the below article.
Hypervisor vs Container technology – Let’s discuss
Prerequisite
To complete this guide you need to fulfil the below prerequisite.
- You need to have a Linux machine.
- You need to have experience in using basic Linux commands.
Agenda of the Guide
In this guide, we will install docker on an Ubuntu machine and then deploy a sample ‘hello world’ application as a docker container. For simplicity, we will deploy only one container.
We will divide this article into two sections.
- Section 1: Docker Installation
- Section 2: Deploying Sample Application as Docker Container
Section 1: Docker Installation
To install Docker on Ubuntu, run the below commands.
Update the Linux OS package.
sudo apt updateInstall Docker by running the below command.
sudo apt install docker.ioIf you are using a Red Hat Linux machine, then use ‘yum’ instead of ‘apt’.
To check the version of the installed docker, run the below command.
docker --versionOutput:

By running the below command, we can check all the running containers in the Docker engine. Since we have just installed docker, and we have not deployed any container, so output of the below command should show no container.
docker ps(here ps means “process status”, this command will show all the running docker containers which are running)
Output:

We can use the below command to check all the containers (stopped & running).
docker ps -allSection 2: Deploying Sample Application as Docker Container
As we have installed the docker (docker engine), let’s play with it. Let’s deploy a sample application in docker (docker engine) which will run as a docker container.
- To deploy an application as a docker container, we need the docker image, which is nothing but a packaging of that application.
- We need to build the docker image from a Dockerfile.
For this purpose, we will use the below sample Python application.
https://github.com/sk617/my-hello-world-python.git
We need to clone the repo in our local machine by running the below command.
git clone https://github.com/sk617/my-hello-world-python.gitNow go inside the “my-hello-world-python” directory.
cd my-hello-world-pythonRun the below command to build the docker image.
docker build -t <build context> <Path of Dockerfile>Here, -t is for tagging, it is nothing but the name of the image we want to give. It is also called build context.
For details about the ‘docker build’ command, please follow the official documentation of docker.
docker build -t my-hello-world-python .Output:
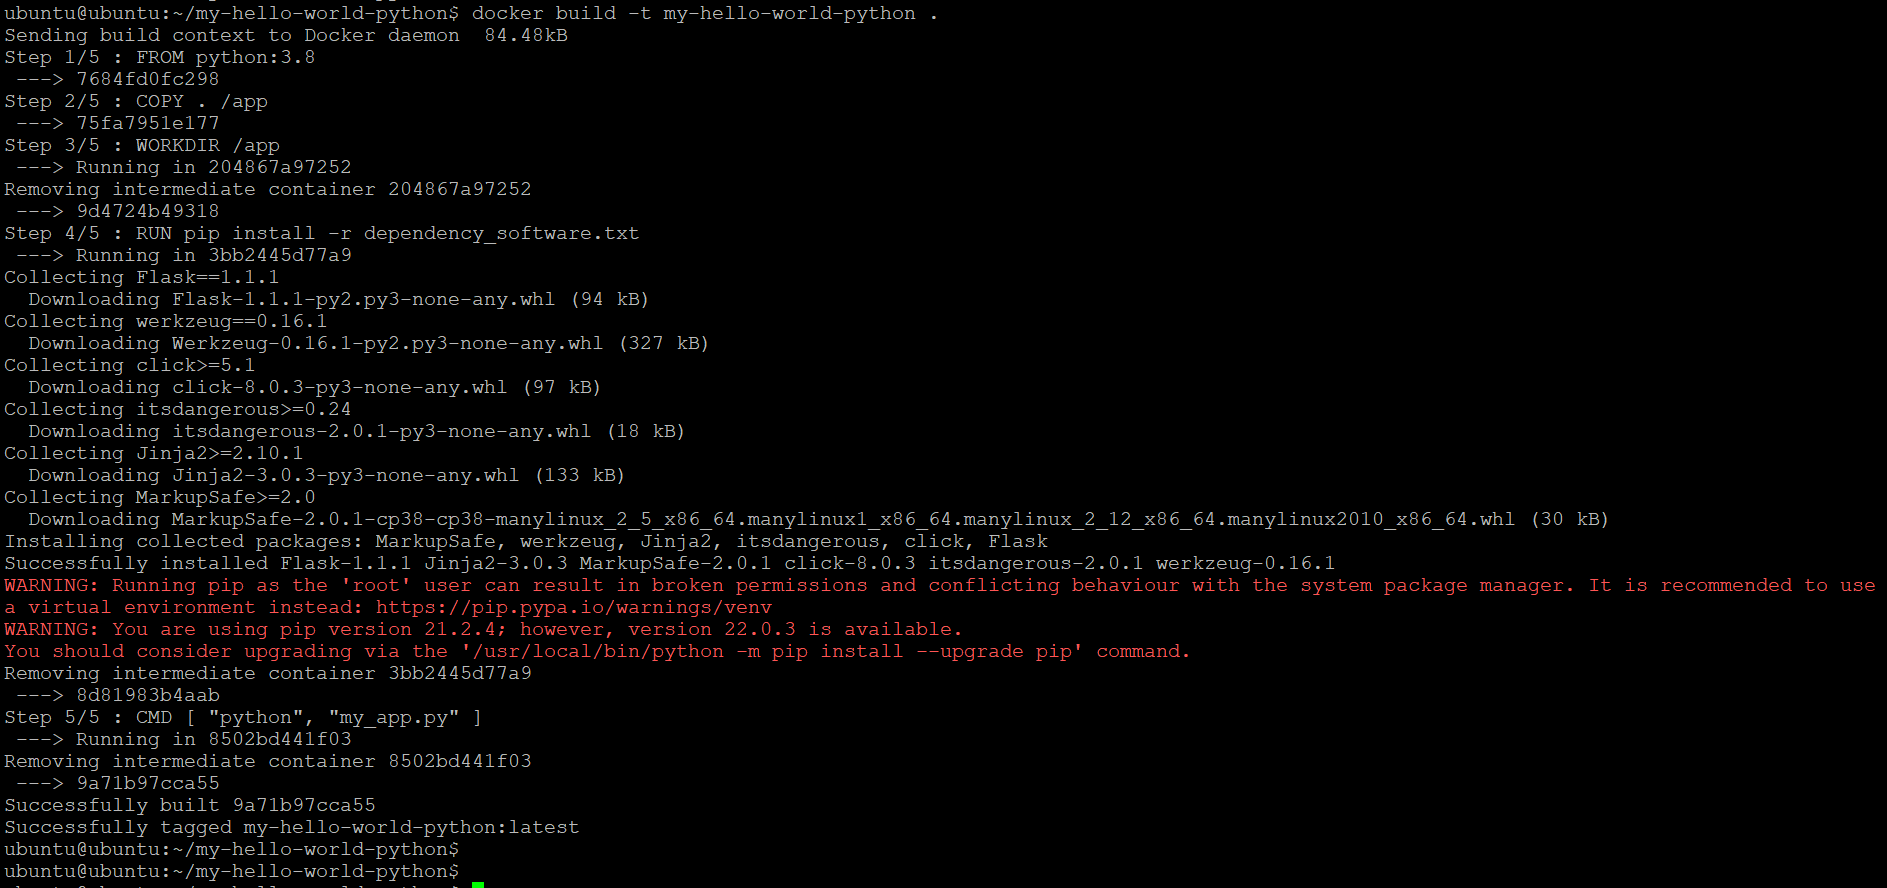
Now we can check the built docker images. For this, run the below command.
docker imagesOutput:

Now we will use this docker image to deploy this sample application as a docker container. For this, run the below command.
docker run -d -p 5000:5000 my-hello-world-python(In the above command my-hello-world-python is the image name, if we don’t specify the container name with the above command, our docker container will have the same name as the docker image. But if we want to have our docker container a different name then we need the below command.
docker run -d --name hello-world-container -p 5000:5000 my-hello-world-pythonhere, our container will have ‘hello-world-container’ name.)

Note:
-d: To run the container in the background (in detach mode). Instead of ‘-d’, if we use ‘-t’ it will run in terminal mode (not in the background),
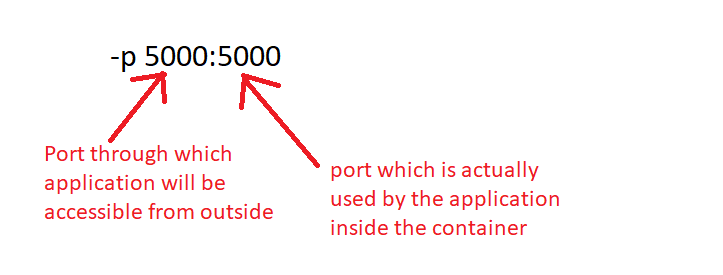
-p: To mention the port.
There are two ports,
- One is the port used by the container internally, i.e. on 5000 port our Python flask application runs inside the container.
- But If we don’t map this port to any external port or if we don’t expose this port to the public, we won’t be able to access it outside the docker host. For this we need
Note: The 5000 port is the default port in the Python Flask application.
To check the running container, we need to run the below command.
docker psOutput:

Now we can access that application by running below CURL command below.
curl localhost:5000Output:

This is how we can deploy any application as a docker container.
Conclusion
In conclusion, this practical guide has walked you through the comprehensive process of Docker installation and the deployment of a sample application, providing a solid foundation for incorporating containerization into your development and deployment workflows. As we navigated through this guide, you’ve acquired essential skills for orchestrating lightweight, portable, and scalable applications within isolated environments.
As you continue your exploration of Docker, delve deeper into its rich ecosystem, encompassing container orchestration tools, networking solutions, and a vast repository of pre-built images on Docker Hub. Embrace the versatility of Docker to containerize diverse applications and microservices, fostering a modular and scalable architecture.
Thank You.
If you are interested in learning DevOps, please have a look at the below articles, which will help you greatly.
- Kubernetes Series: Part 1 – Introduction to Kubernetes | Background of Kubernetes
- Kubernetes Series: Part 2 – Components of Kubernetes cluster | Kubernetes cluster in detail
- Kubernetes Series: Part 3 – What is Minikube and How to create a Kubernetes cluster (on Linux) using Minikube?
- Introduction to Ansible | High-Level Understanding of Ansible
- Basics of automation using Ansible | Automate any task
- What is End-to-End Monitoring of any web application and Why do we need it?
- What is “Monitoring” in DevOps? Why do we need to Monitor App/DB servers, Transactions, etc.?
- DevOps Engineer or Software Developer Engineer which is better for you?- Let’s discuss
- How To Be A Good DevOps Engineer?
- Network Connectivity Troubleshooting Guide for Beginners